Integrating your Voila Account on Peoplevox
This document provides step-by-step instructions for integrating your Voila account with Peoplevox.
Last updated 10 months ago

Courier Integration Setup from Peoplevox to Voila
3 Phases:
This process involves integrating a courier service in Peoplevox, utilising Voila as the intermediary. It consists of three main phases:
Peoplevox Courier Integration Setup: Configuring the courier connection within Peoplevox to point to Voila.
Voila Configuration: Setting up the corresponding connection and processing rules within Voila.
Key Linking: Establishing the secure communication link between Peoplevox and Voila.
Prerequisites:
Access to a Peoplevox account.
An API user account within Voila.
An API token for the API user within Voila.

Integration Process Detailed Steps:
Generate a Secure Key:
Use a random key generator (e.g., Randomkeygen.com) to create a unique and secure key.
Peoplevox Configuration:
Utilise the generated key during the courier integration setup within Peoplevox.
Voila Configuration:
Enter the same generated key into the appropriate linking configuration section within Voila.
Note: Ensuring the same key is used in both Peoplevox and Voila is crucial for establishing a successful connection.
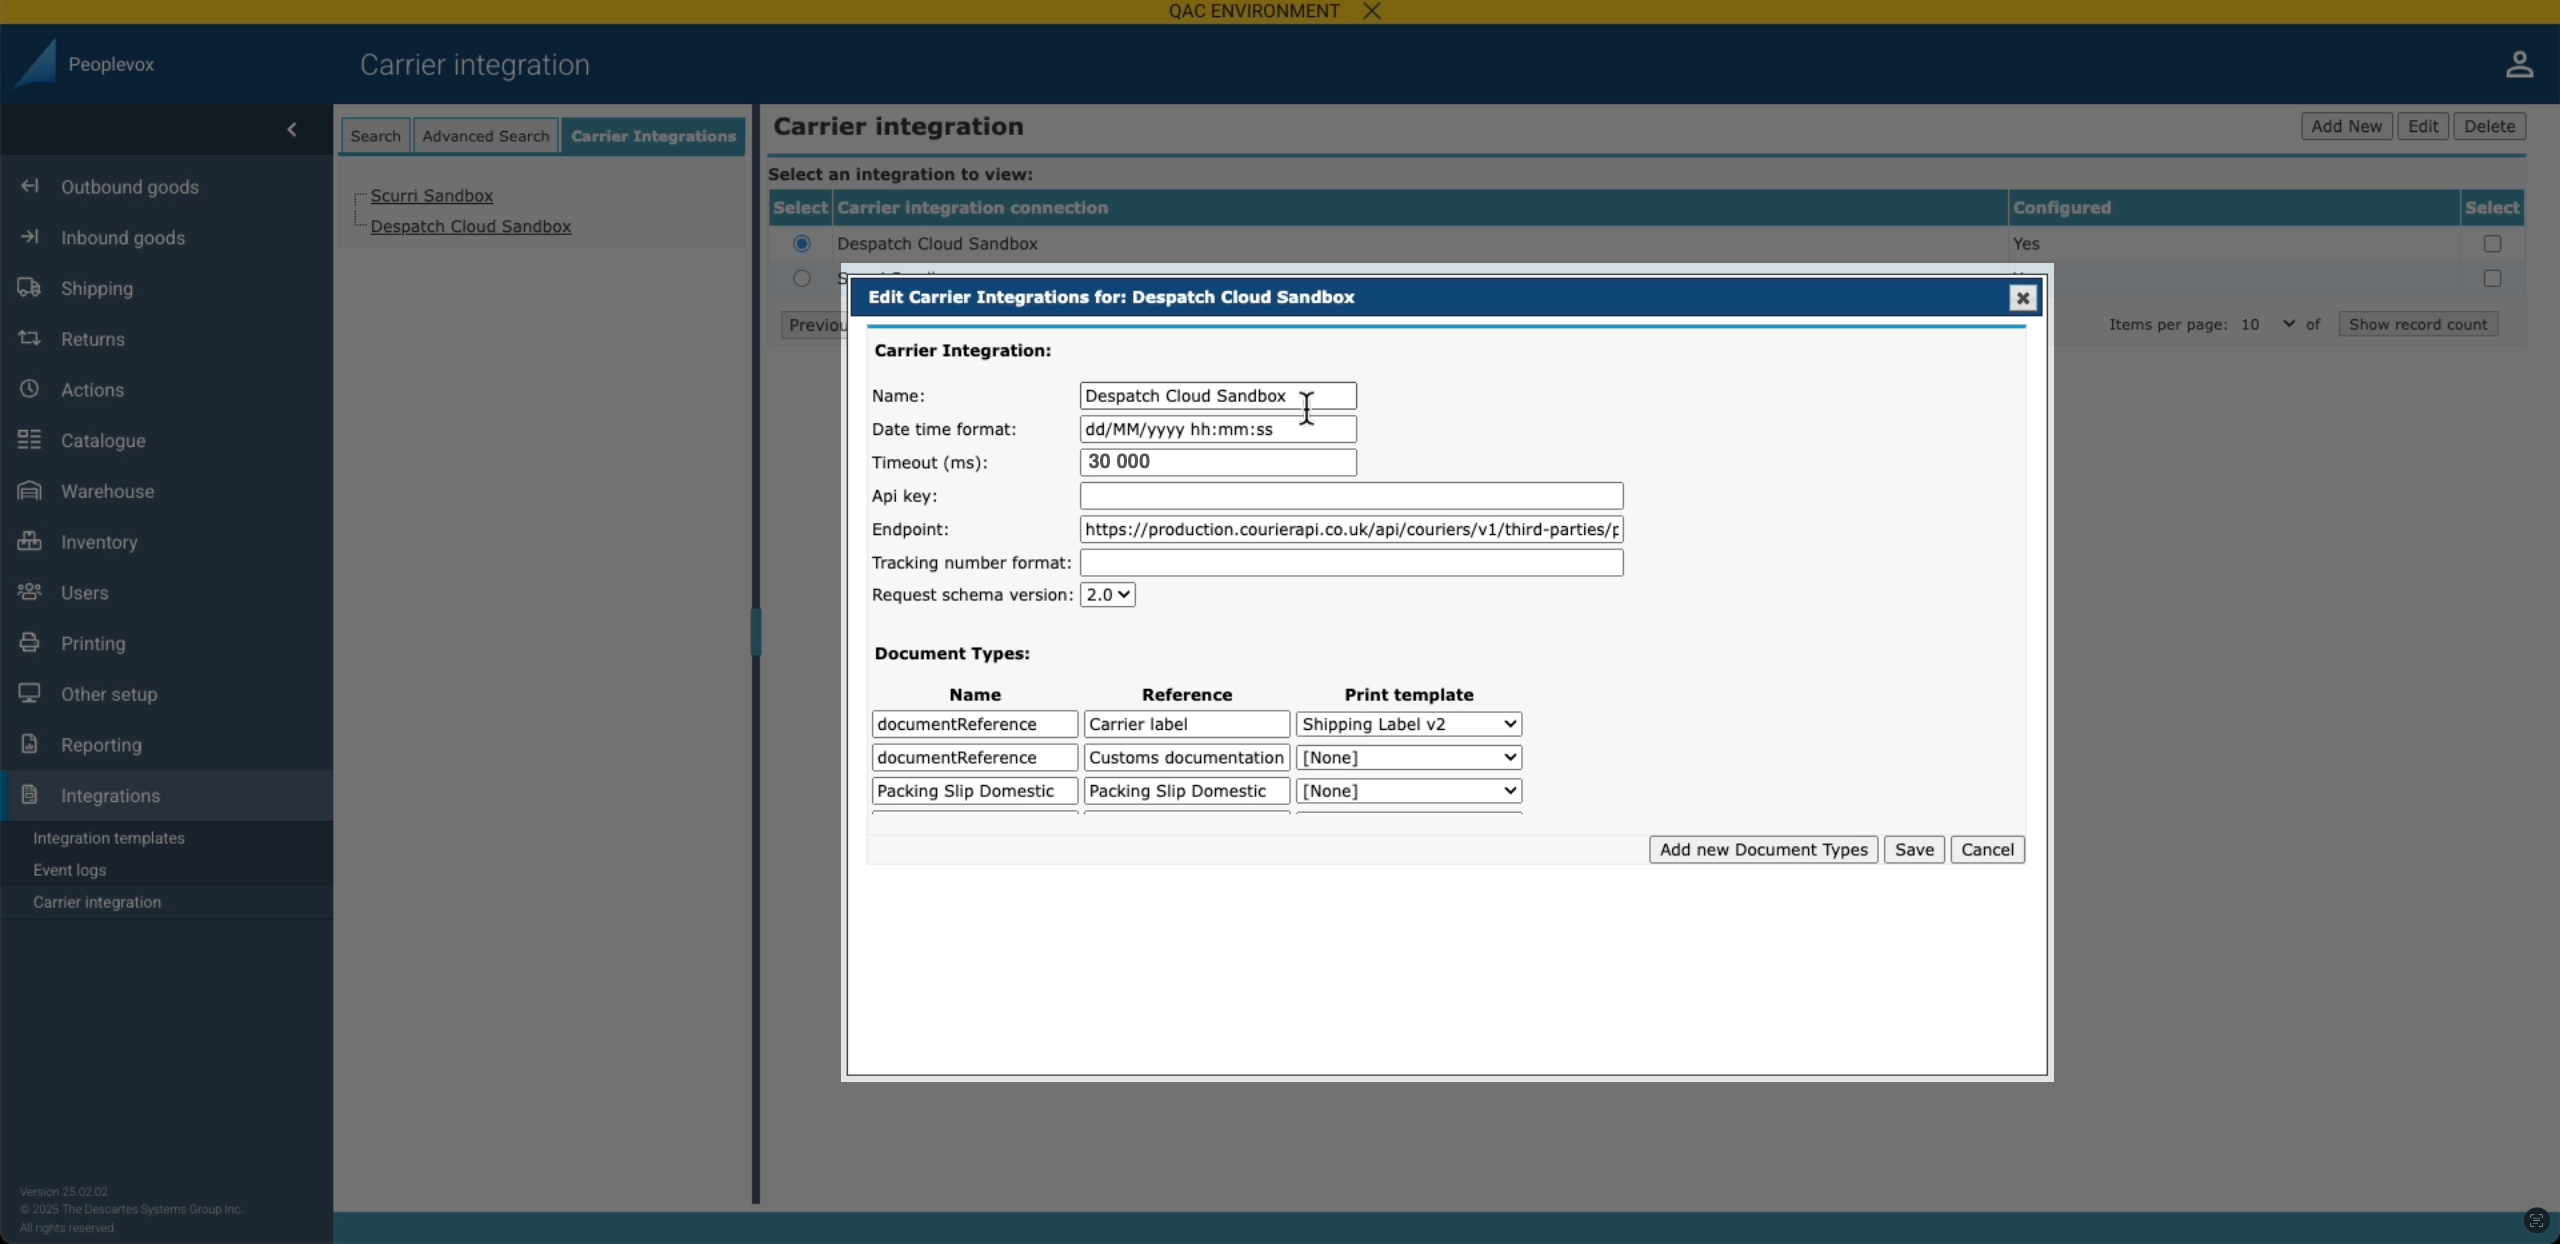
Setting Up the Courier Integration in Peoplevox:
To integrate a new courier service via API, follow these steps:
Navigate to Integrations: In your Peoplevox dashboard, click on "Integrations."
Access Carrier Integrations: Select "Carrier Integrations" from the available options.
Add a New Integration: Click "Add New" to begin the setup process.
Name Your Integration: Enter a descriptive name for the courier integration.
Set the Timeout: Enter "30 000" for the timeout value.
Enter the API Key: Enter the secure key you generated earlier.
Enter the Endpoint: Enter this endpoint URL which is static and remains consistent:
https://production.courierapi.co.uk/api/couriers/v1/third-parties/peoplevox/create-labelSpecify the Version Schema: Set the version schema to "2.0."
Configure Document Types:
Document Type 1: Carrier Label
Name: Enter
documentReferenceReference: Enter
Carrier LabelPrint Template: Select the customer's preferred shipping label template.
Document Type 2: Customs Documentation
Name: Enter
documentReferenceReference: Enter
Customs documentationPrint Template: Select the customer's customs documentation template.
Document Type 3: Packing Slip Domestic
Name: Enter
Packing Slip DomesticReference: Enter
Packing Slip DomesticPrint Template: Please select the appropriate template.
Click to Maximise the Image.

Setting up linking to Voila
Provide Voila with the generated random Pairing Key you generated earlier or create a new one if you are starting here: Randomkeygen.com
In the Playground or in Postman, send a POST Request to this endpoint:
https://app.heyvoila.io/api/couriers/v1/third-parties/peoplevox/link-auth
headers: {'api-user': 'YOUR API USER', 'api-token': 'YOUR API USER TOKEN'},This is the JSON to POST - change the authorisation header to the key we generated earlier, and change the address to the address you're shipping from:
Example{
"peoplevox_authorization_header" : "RandomGeneratedKey",
"ship_from": {
"name": "Fake Company",
"phone": "01377 334140",
"email": "[email protected]",
"company_name": "Fake Company",
"address_1": "Unit 99, Warfield Road",
"address_2": "",
"address_3": "",
"city": "Fakefurt",
"postcode": "YO250FK",
"county": "East Yorkshire",
"country_iso": "GB",
"company_id": "03764419",
"tax_id": "284256444",
"eori_id": "GB284256444000",
"ioss_number": null
}
}Populate the information above with live customer details
Set up a Smart Shipping group in Voila
Find detailed instructions for setting up Smart Shipping in Voila by following this link
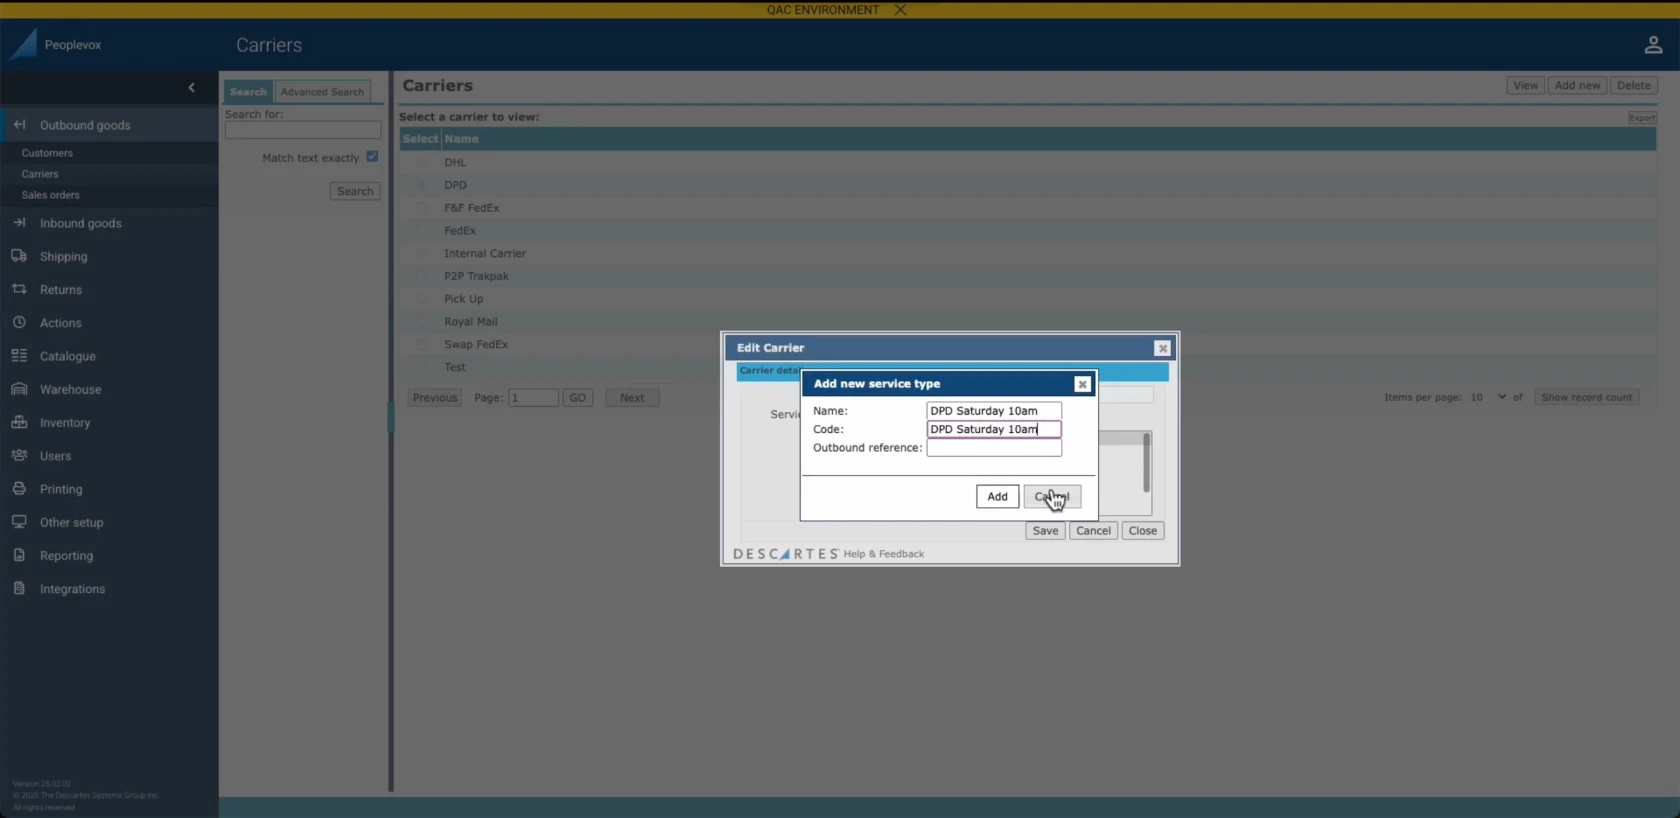
Setting up a Service Type in Peoplevox that Corresponds to a Smart Shipping Group in Voila
Navigate to 'Outbound Goods' and then click 'Carriers.'
Select 'Add New' for a new carrier or 'Edit' an existing carrier.
In the 'Name' field, enter the desired service type (e.g., 'DPD Saturday 10 am', 'Ebay', 'Etsy' or 'First Class').
In the 'Code' field, enter the exact same name as the Smart Shipping Group (e.g., 'DPD Saturday 10 am'). This ensures proper matching.
Click 'Add' or 'Save.'
Important, verify that the 'Code' matches the Smart Shipping Group name precisely.
Click to Maximise the Image.
Next Steps & Support
📚 Need help? Explore more of our documentation, video walkthroughs or contact support.
With Voila, you will be set up for seamless, efficient shipping.
